Home Lab Series | Part 1 | First Boot with Raspberry Pi
In this article, we will focus on setting up Raspberry pi with Raspbian OS (Raspberry Pi OS) and further establish a connection with SSH considering best practice to have a secure way to sign in.
Choosing the right OS essentially depends on the use case of your home lab/server, what do you plan to do with it? a media server, selfhosting a website, NAS storage or all of them. This can be achieved by deploying multiple docker instances or by installing relevant packages and configuring them either way it up to you and your personal choice. For me, I am going to stick with Raspberry OS and docker instance for each relevant use case.
Pre- requirements:
- Micro SD card
- Raspberry Pi Imager (Download link - https://www.raspberrypi.com/software/)
- Internet connection (of course)
- Raspberry PI device (you might need one :P)
- USB card reader or an adapter
Installing an OS
Installing Raspberry Pi Imager
Download the official Raspberry Pi imager and install according to your host system. For ubuntu or similar distro use the below command to install Raspberry Pi Imager
1
sudo apt install rpi-imager
Once installed connect your MicroSD card to your system either through an adapter or USB card reader.
Selecting Pi Device
Open Raspberry Pi imager select your device in my case its Raspberry Pi 5.
 Raspberry PI Imager
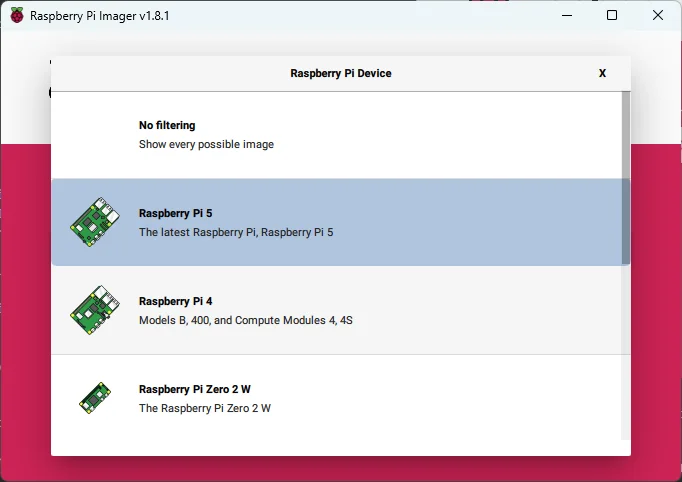 Device Selection
Selecting the OS
Select the desired OS there are few to select the one that is displayed by default are either 64 bit or 32 bit which with desktop environment (GUI).
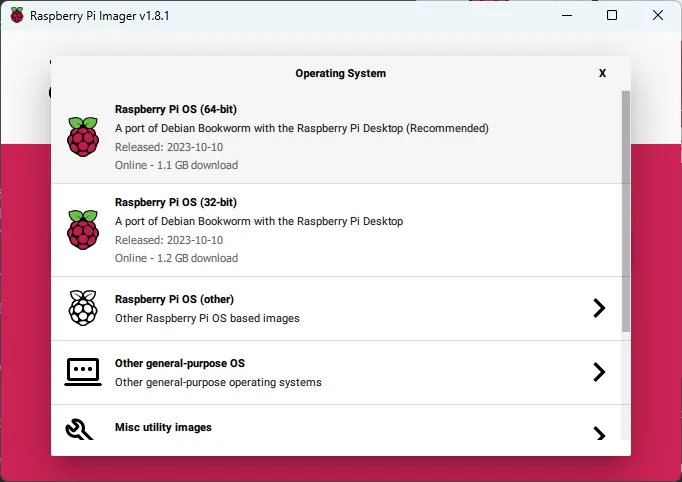 OS Selection
If you want to see more options scroll down a bit and you can see Raspberry Pi OS (other) 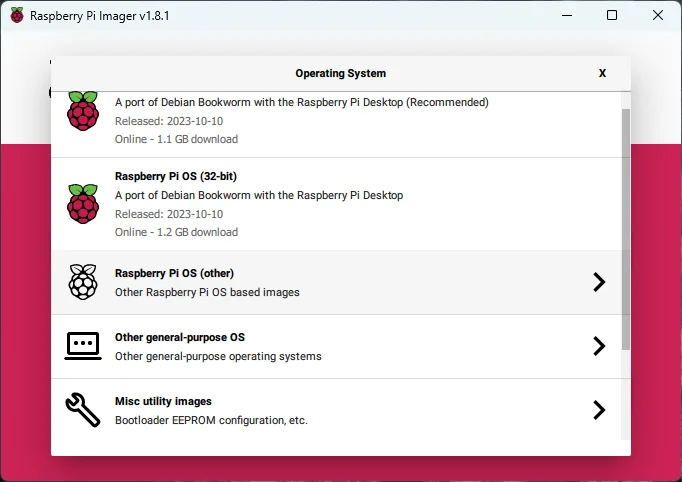 Raspberry Pi OS other options
Personally, I prefer Raspberry Pi OS lite (x64) given its light with no desktop environment and is only 400MB in size. Which makes it perfect for my use case as I can utilize the extra resource for docker instances I get eliminating desktop environments.
 Selecting 64bit Lite Version
Selecting Storage Media and OS Customization
Once you have selected the OS, now select the storage device in our case, the MicroSD card. 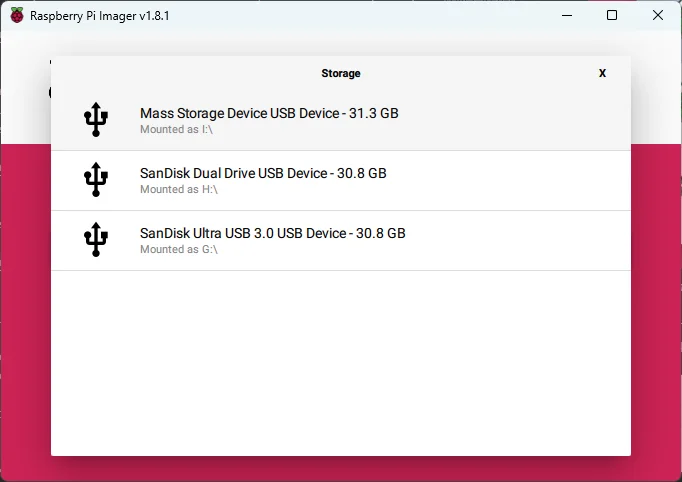 Selecting Storage Device
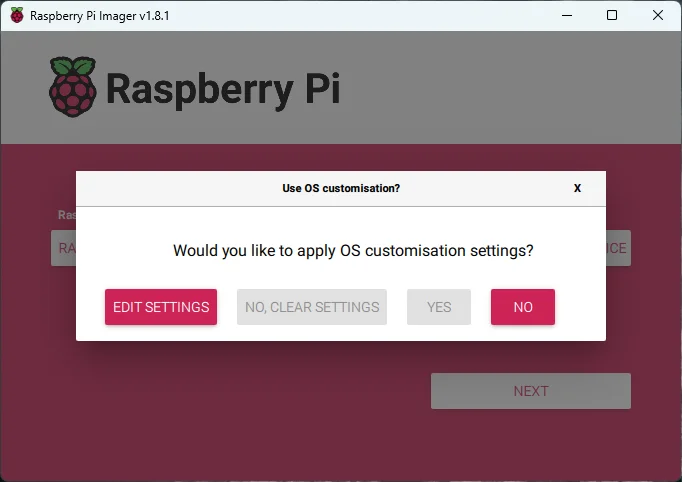
Further when we move to the next step the imager will prompt you if you would like to customize you OS.
 OS Customization
Provide a hostname for your device, username password, configure wireless connection in case you need to and select the region.
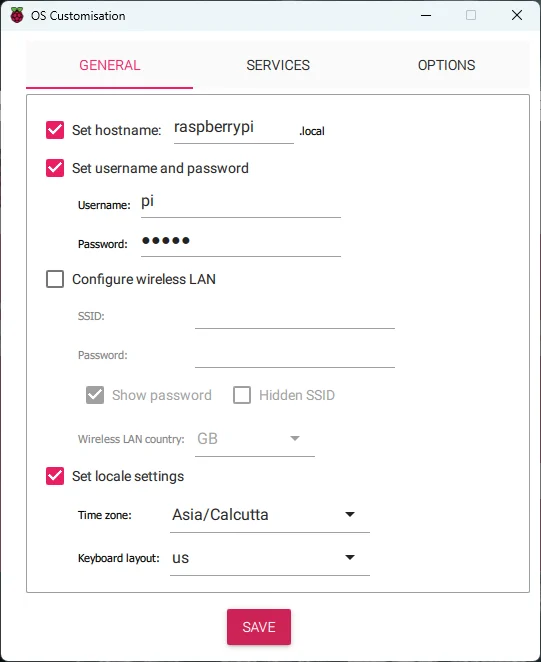 Customization
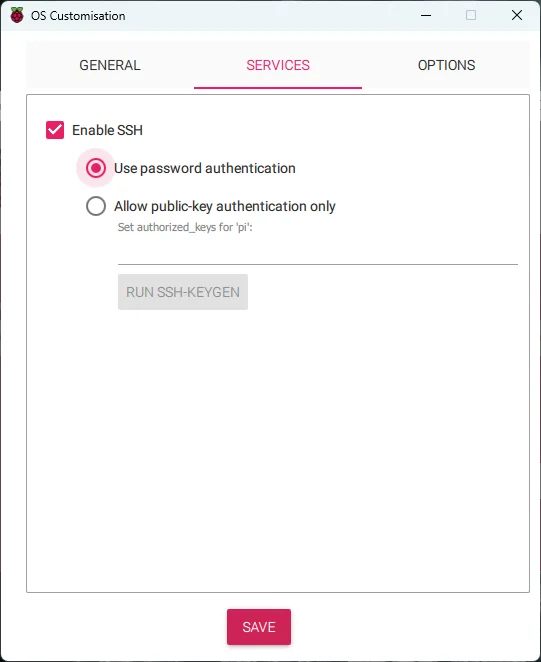
Moving on to the next tab “Services” select password authentication for your SSH login.
 Enabling SSH
You can generate a keypair now, but I would suggest doing it later as we need to do some hardening later.
Click next and you will be getting another prompt with confirmation asking if you are sure with applying the customization. Hit Yes !
 Prompt on Customization
  Prompt on Storage Data Wipe
 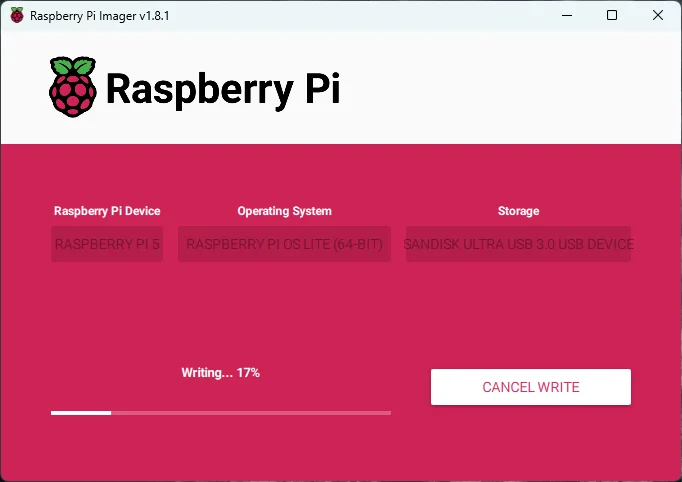 Writing Data
It will take up to 15 minutes depending on your system and microSD card. Raspberry Pi imager will write the OS and verify your files before completing.
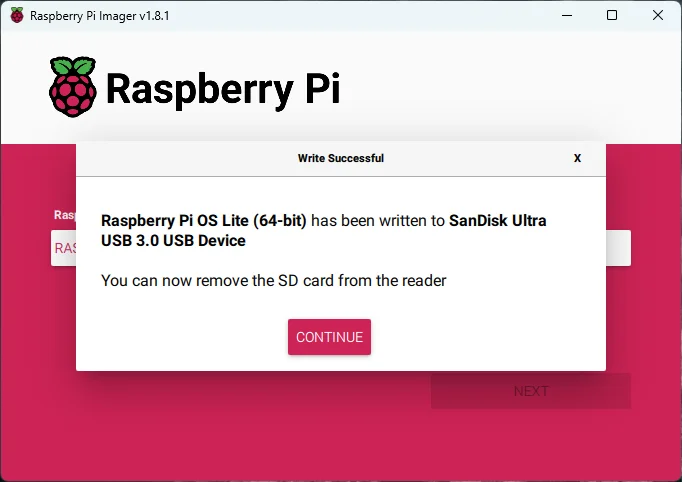 Done!
Done!
Done! Now put your MicroSD card into your Pi and connect the power source.
Post Installation
You can either login to your router page or use nmap to list the IP address of your Pi
1
2
sudo nmap -sn [Your router's IP address]/24
# Example:  nmap -sn 192.168.0.1/24
If you enjoyed this article or my other content, consider buying me a coffee. Your support helps me create more!